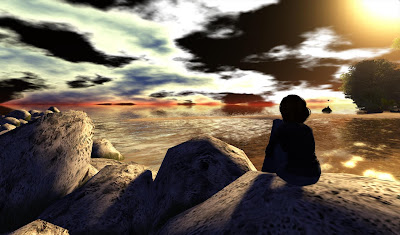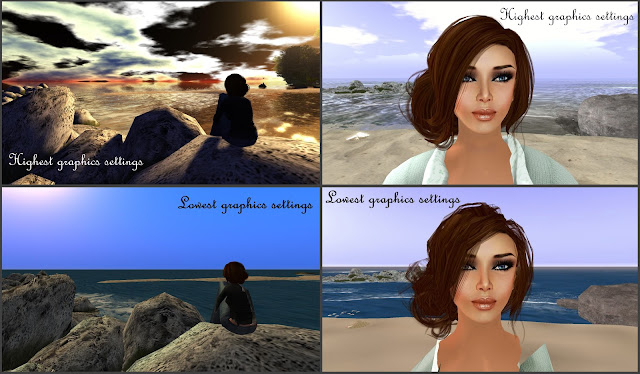
As technology and demand increases, the graphic standards in Secondlife just keep going from strength to strength. With enhanced capabilities, our vast (and often incredibly beautiful) virtual surroundings are more immersive than ever – But what we see is ultimately up to us.
This is a basic guide to personalizing your graphics options within SL, enabling you to reduce lag, individualize your preferences, and take advantage of the breakthroughs now available and right at our fingertips! This includes real-time shadows, full dynamic lighting, ambient occlusion and depth of field, all of which create some of the best virtual graphics seen to date across the board.
 You will need an OpenGL 3.0 capable graphics card to support all of the following features. A useful guide can be found at http://www.videocardbenchmark.net/to see your own cards capabilities.
To enable and adjust your lighting/shadow settings -
Open ....Me>Preferences>Graphics>Advanced
(If you cannot see the advanced menu, activate it by pressing Ctr Alt and Del)
Check the ‘Atmospheric Shaders’ and‘Hardware Skinning’. This will allow you to also enable ‘Lighting and Shadows’, ‘Ambient Occlusion’, ‘Shadows’ and‘depth Of Field’, and to choose the typeof shadows you want to see. If you check‘Basic Shaders’ you can then also enable water reflections.
{Lag Check:-Lighting and Shadows and basic shaders can significantly lower your PC’s performance. If you find that you crash when enabling it, try disabling ‘antialiasing’. }
Sounds complicated? Don’t panic!
So What Do These Actually Mean?
Shadows
Shadows are fairly self-explanatory. In terms of SL it means that you are enabling the shadows to be cast realistically in the opposite direction to the sun or moon. They will begin to fade away in relation to your chosen draw distance (in your graphics preferences). You will see the shadows on avatars (and imposters), glowing prims, sculpted prims, water, ground, foliage, and particles (that aren’t full bright) - In fact, anything that is set to ‘full bright’ will not receive a shadow. In case you are unsure of what I mean, ‘full bright’ is, in my personal opinion, a fairly unpleasant effect you can set on objects, that allows them to remain lighted even in the dark.
In preferences, you can choose what shadows you see on your screen, from ‘none’, ‘sun/moon’, to ‘sun/moon+projectors’.
‘None’ – If you choose this option, you will see some improvement as opposed to turning off ‘Lighting and Shadows’ completely. For example, the lighting from the sun, moon and local lights will appear smoother, and numerous lights can light your surrounding simultaneously. Also, you may notice lights on surfaces closer to you are brighter than those in the distance.
Sun/Moon- Simply causes all of the relevant objects to now cast shadows or have shadows cast on them.
Sun/Moon + Projectors – This means that objects can now cast shadows from the light of the sun and moon, as well as a maximum of two other light sources on your screen, e.g lamps, facelights.
Ambient Occlusion
This is a very subtle but effective option that creates a more realistically smooth and dark shadow on surfaces. It’s completely unnecessary for a beautiful image overall, but is definitely a lovely effect if the small details are important to you – For example in photographs, machinima production, or if you are in a particularly lovely landscape.
Depth Of Field
A beautiful and very useful option, especially for photographs. As in rl photography, the depth of field relates to the focus of the lens – So in terms of SL, it means that you can focus fully on the focal point of your screen, while everything further into the distance will appear out of focus and blurred. This can also be fairly useful when judging make up or hair for example, simply to highlight yourself against the background.
Shaders :-
Bump Mapping & Shiny – Depth and the shine effect on objects
Basic Shaders – This makes a big difference in how flat and basic the world appears
Atmospheric Shaders – Activate this for a huge impact onscreen. This gives you a realistic sky and water effect. Requires BASIC SHADERS to be on.
Water Reflections – The ability to see water reflections ( reflections can be chosen in ‘reflection detail’ )
{ Lag Check –Atmospheric Shaders and Water Reflections demand a good deal of performance from your PC and Graphics Card. It may cause lag to enable these options for some. }
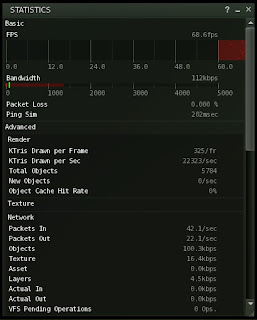
The lower you set these main preferences in graphics, the less demand is placed on your PC, and the faster your environment will load and run. The higher you set them, the slower it will run but only if your PC and Graphics Card are working at their limits . Everyone’s setup is different. The best way to optimize your preferences for you personally is to press ctrl Alt D to open the Advanced menu, and select Performance Tools > Statistics bar. Here you will see your Frame Rate (FPS) -Ideally you do not want it to be dropping below a steady 10 - 15 fps, preferably over 25 is perfect for a smooth run. Try adjusting your preferences one by one, and see the difference it makes to your fps. If you need to compromise a little, find what works best for you, and save. Don’t forget you can always alter them temporarily – For example, in crowded situations I usually lower my draw distance and increase avatar imposters (The number of avatars you see in full detail – The rest will appear with far less). Equally, in quiet landscapes I increase my draw distance, and alter my windlight settings for a truly magnificent scene. Sometimes depth of field is perfect for my photos, though I wouldn’t leave it on all the time!
 Though I’ve tried to cover the standard and arguably most essential basics here, every viewer is different - It’s worth checking your own viewers manual/wiki for it’s specific graphics options, and it many offer more comprehensive, updated and extended options in addition to the one’s outlined here.
Firestorm/Phoenix Viewer - http://wiki.phoenixviewer.com/preferences_display_tab
Imprudence Viewer - http://wiki.kokuaviewer.org/wiki/Imprudence:Features
Dolphin Viewer - http://dolphinviewer.eregion.de/?s=graphics
I’ve created a short movie to show the graphics in action during a walk through ‘MAYFAIR’, one of the first all mesh sims in SL. I’m no machinima producer by anyone’s standards, but towards the end you can see the detail of mesh clothing up close and as it moves, as well as the graphics options take effect as they activate one by one, and just how they work in relation to one another- I hope this brief overview helps you to enjoy your SL, just that little bit more!


0 comments:
Post a Comment
Comments will be reviewed and posted within 24 hours. Please note any abusive content or outside promotional links may not be approved.